Effective Prompting Guide
This guide will help you create powerful prompts that generate the exact creative assets you need. Understanding how to communicate with the AI through prompts is key to getting consistent, high-quality results that match your creative vision.
Creating New Themes
Broad vs. Specific Prompts
-
Broad Themes: When you provide a general theme (e.g., "Valentine's Day" or "Summer"), the system will creatively interpret this theme, generating varied results that align with the concept.
-
Specific Prompts: For precise control, include detailed elements in your prompt. You can specify:
- Scene Context: Location, surrounding objects, people (e.g., "in a modern kitchen with marble countertops")
- Lighting and Shadows: Natural light, studio lighting, warm tones, harsh shadows, soft diffused lighting
- Camera Angle: Low angle, eye level, aerial view, three-quarter view
- Motion: Static display or in motion (e.g., "car driving through splashing water")
- Depth of Field: Elements in focus vs. blurred background (e.g., "shallow depth of field with product in sharp focus")
- Time of Day & Weather: Sunrise, dusk, stormy, foggy, bright sunny day
- Composition & Framing: Rule of thirds, centered, asymmetrical, wide shot, close-up
Effective prompts follow a specific structure for best results:
- Use square brackets to identify the category you've created when you uploaded your assets:
[2024 Ford Ranger Raptor](This exact format helps the model recognize your specific category whether it's a product, style, or environment) - Be specific about setting and context:
[2024 Ford Ranger Raptor] driving through rugged mountain terrain at sunsetis better thantruck outdoors - Avoid vague descriptors:
premium feelingis less effective thanluxurious leather interior with ambient lighting - Include camera angles when relevant:
[Product] from above, birds-eye viewor[Product] close-up, macro photography
Example of a good prompt: [2024 Ford Ranger Raptor] splashing through mud in a dense forest, dramatic lighting, side view
Example of a less effective prompt: Ford truck outside, nice looking
Using Category References
One of the powerful features is the ability to reference categories you created during dataset upload:
- Use square brackets to reference a category:
[Category Name] - Example:
[Coke Zero] on a wooden table at sunset - Complex example:
[Emirates female flight attendant] serving refreshments in an [Emirates premium economy cabin]
This technique ensures the system generates the correct product variant or element from your dataset.
Text-Based Editing
After generating an initial image, you can refine it using natural language edit prompts:
- Highlight specific changes you want to make
- Describe the desired modification as if speaking to a designer
- Be clear about what elements should remain unchanged
- Focus on one significant change per edit for best results
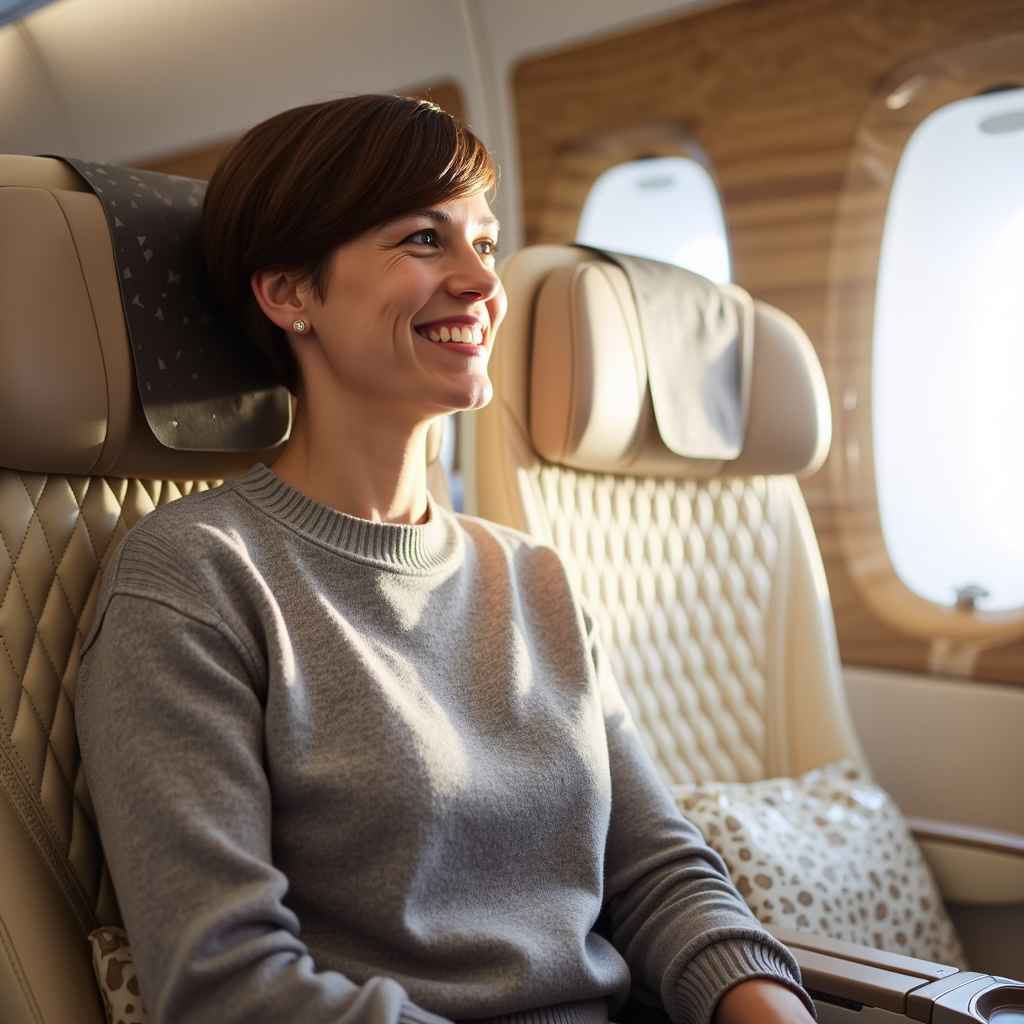
Example 1: Changing the Person
Initial prompt: "A passenger looking out the window and smiling"
Size: 1024x1024
Edit prompt: "Replace the woman with an Asian woman"
Size: 1024x1024

Edit prompt: "Replace the woman with a business woman"
Size: 800x1100

Edit prompt: "Replace the woman with an Australian man"
Size: 800x1100

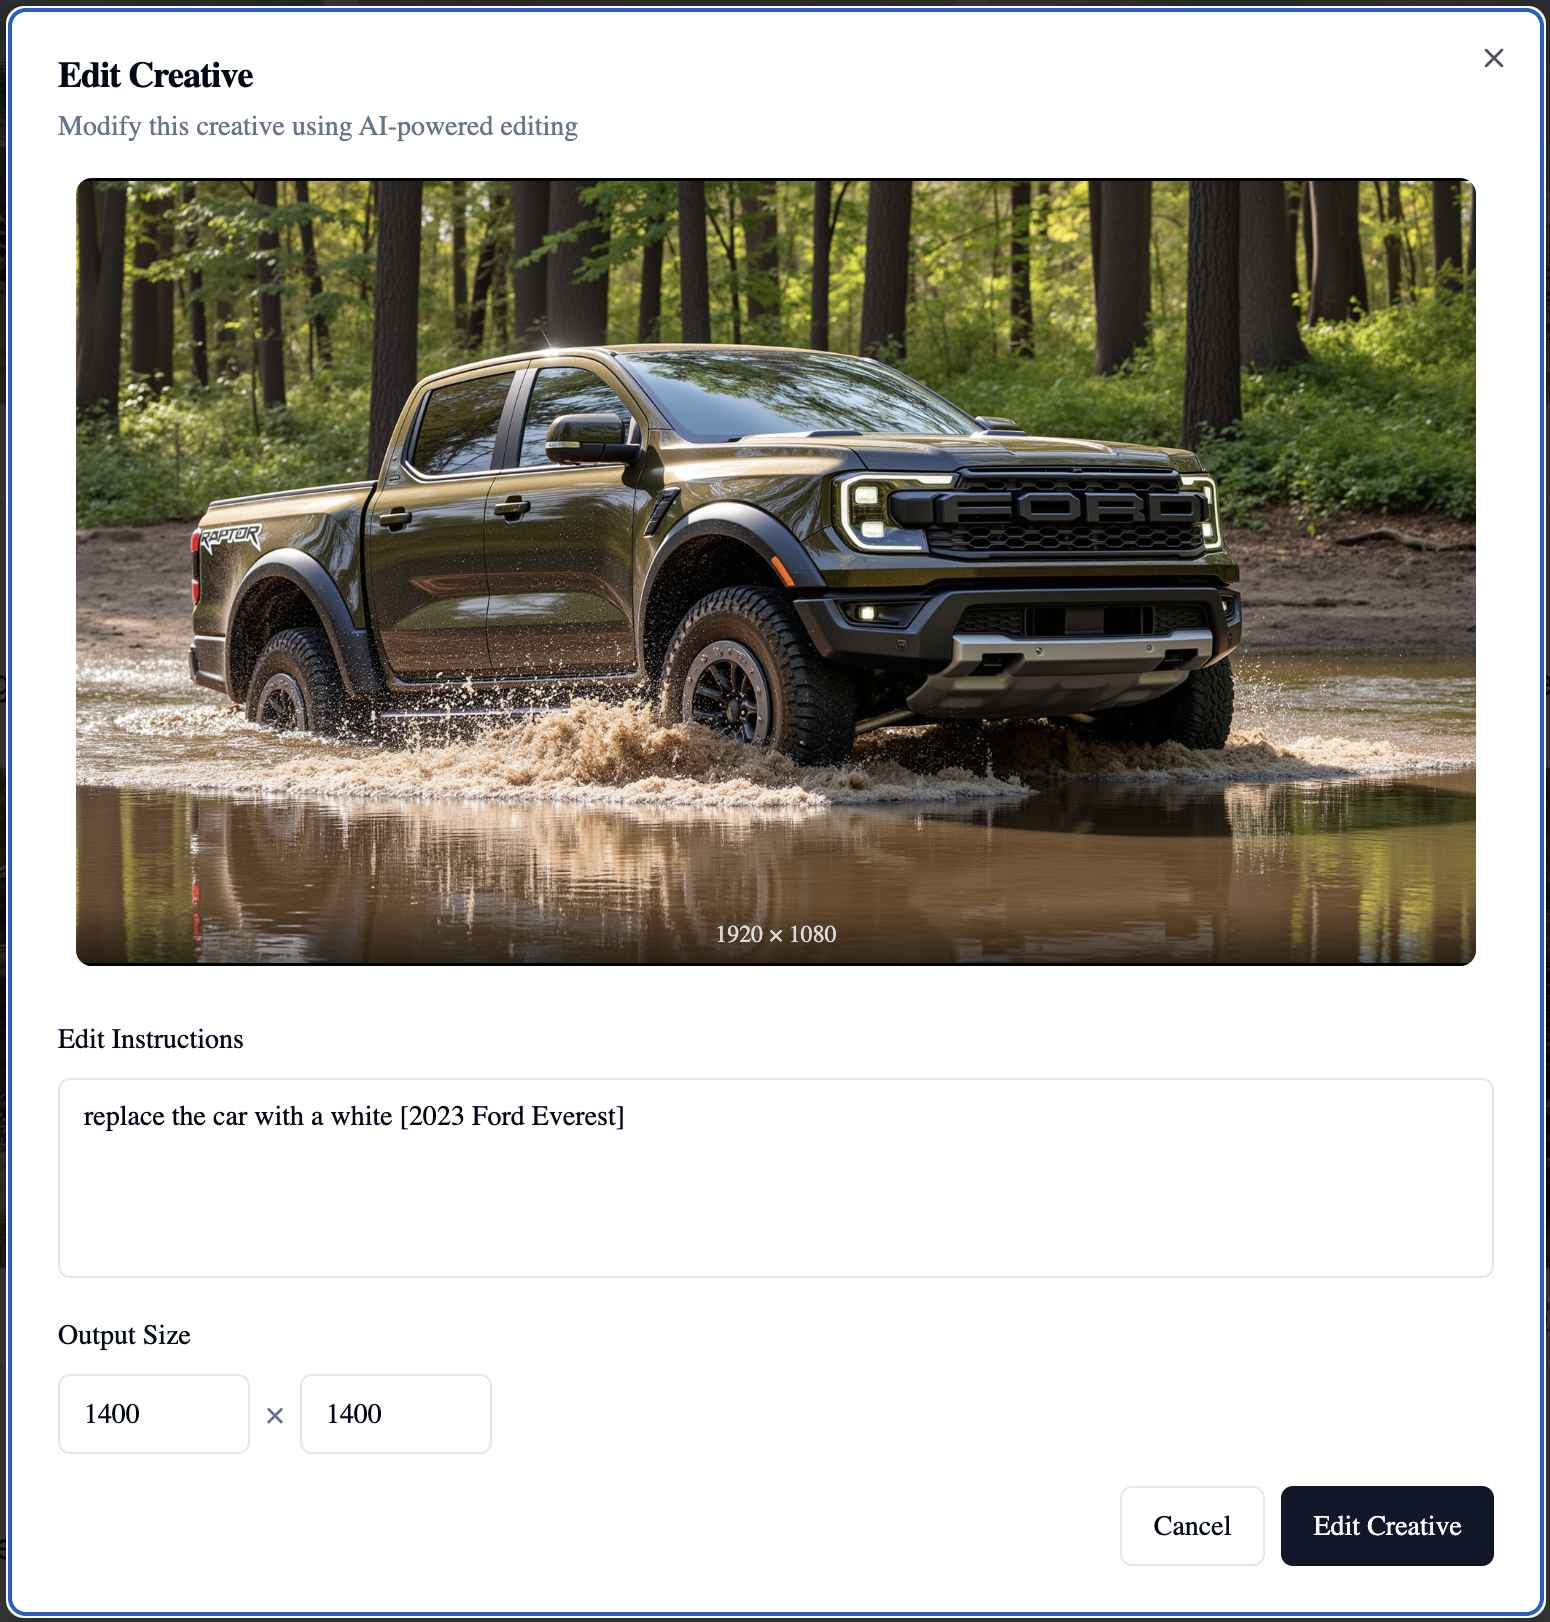
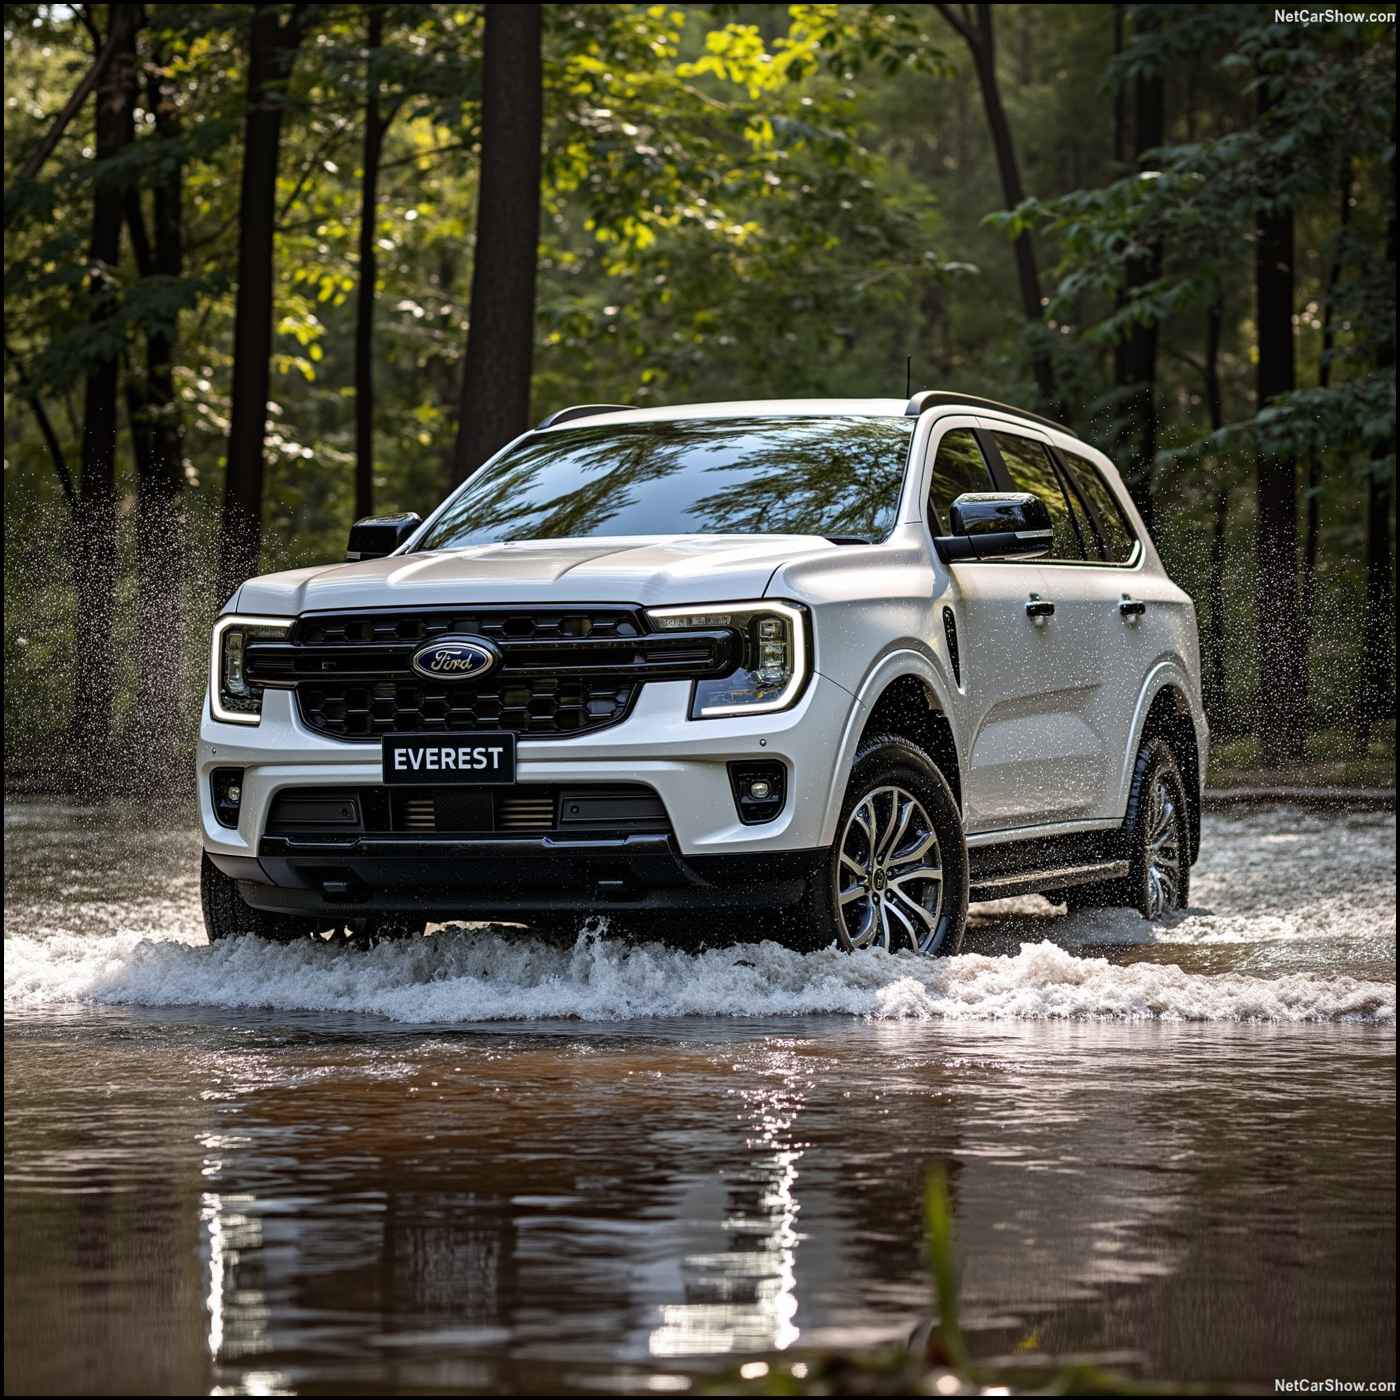
Example 2: Changing the Vehicle
Initial image with edit prompt "Replace the car with a white [2023 Ford Everest]" and new 1400x1400 size specified
Result
Best Practices
- Start Simple: Begin with a clear, direct prompt before adding complexity
- Iterate: Use the editing feature to refine results rather than starting over
- Be Specific: The more precise your language, the more control you have
- Reference Categories: Always use
[Category Name]syntax to ensure product accuracy - Mind the Details: Specify important elements like lighting, angle, and environment for consistent results
Remember that the AI responds best to clear, descriptive language. If your initial results aren't exactly what you want, use the editing feature to refine rather than starting over with an entirely new prompt.